Image Map
Showing posts with label DIY. Show all posts

Tuesday, December 17, 2013

Mr. Mustache mug {DIY}

Do you remember my old Owl mug? My dear and precious DIY mug? Well..it's now broken.

I didn't want to make another one, but I had a simple black mug and the Christmas stalls for the cat shelter I support was coming, so....I decided to paint a new one :)

November was the month of Movember, and decided to dedicate my new mug to it.

This time I used a proper golden pen that paints on ceramic - I bought it in Italy this summer and paid it 1.50€ which is more or less the same price of the Sharpie..only this doesn't need to go in the oven, takes 2 days to let it dry completely and...the colour never fades!! I'm very happy with it!

I'll show you my design:

The front


The back


I used this pen twice, but this time I was a bit in a hurry and I couldn't finish the mug perfectly....

 I got the inspiration from some Mr. and Mrs. mugs I saw in a shop { but they were 8.00 pounds each....basically, 9.50 euros!!! pfff}


If you want to make a donation please visit Spanish Stray cats on Facebook! {If you don't fancy cats, please help Spanish Stray Dogs} --They all need your help!!

Do you have any expensive mug you want to make a copycat from? :)

Until next time,
Daniela

Monday, December 9, 2013

Christmas decorations & DIY Felt Christmas socks

How are you getting on with your Christmas Decoration?

I am almost done {I say almost because I usually end up buying more decorations}:

My tree is up...


 My Santa is climbing the balcony...


my table is well decorated..


and my brand new DIY mini christmas socks are pinned to the shelf :)


You like them? it's not too late to make them yourself!


What you need:


 red, green and white felt

:: Step 1::
Draw a little sock on a white paper, you will be using it as a silhouette:


:: Step 2::
 Pin the paper silhouette to the fabric and cut - don't forget to cut the white fabric as well for the collar of the socks.


:: Step 3::

Sew the socks :)


:: Step 4::

Flip them over, sew the white collar  :)


:: Step 5 ::
Pin them wherever you like ;)


They may also be used as Christmas tree ornaments, depending on their size :)

Have you made your own Christmas decoration ths year?

Until next time,
Daniela

Wednesday, September 25, 2013

Cheap&Creative Fall decor

Well Well, I can start feeling that Fall is arriving here in sourthern Spain too! Days are still sunny and we are wearing short slevees but evenings are getting chilly and I already spotted few people selling roasted chestnuts {which I simply love!!}

I like all seasons, some more than others, but fall colours are simply stunning don't you think?  This is the reason why I have added a small fall decoration in my house with the leaves and pinecones I found nearby my house!

This is my creation:


You can easily create your own decoration with no money at all! Simply grab golden leaves and add some old candles on a plate :) {I use those candles for Christmas decorations too!!}


I really like the outcome and I didn't spend one single cent!


Check out some other decorations I liked while I was browsing the web:

Clock wise:

1. Fall jars decoration via Pinterest;
2. Table center piece with candles via Pinterest;
3. candles and small pumpkins via Pinterest;
4.Table decor for a nice fall lunch/dinner via Pinterest;


Have you already made your fall decorations? What did you use?

Happy Fall season!


Until next time,
Daniela

Sunday, September 22, 2013

Shopping bag tutorial

Few weeks ago I have mentioned on Pretty Elements facebook page that I have sewed a shopping bag for a good cause :) The cause is a cat shelter in my area: Spanish Stray cats. They are organising a small stall and all the money they make will help the gorgeous cats and kittens that are currently staying in their premises.

I have completed my bag (but I have other ideas in mind for this project) and will share with you the tutorial: it's very easy and you can have a personalised shopping bag :)


::STEP 1::
Cut the fabric of your choice {make sure to add 1-2 inches at the original size you want you bag to be} - I've cut mine 45 x 55 cm.


::STEP 2::
I wanted to add a lining with a different fabric - if you want to add a lining too, measures are the same.

::STEP 3::
Sew the edges of both fabric like two sacks: both have to be sewed inside out (only the red and white sack will  be turned out).

::STEP 4::
Since we ladies always carry loads of stuff with us, it would be good to make a pocket ;)

Cut a piece of fabric in hexagonal shape and pin the edges:


::Step 5::
Sew it on the external fabric:


I have also sewed a string of the fabric I used as lining :)

::STEP 6::
Now, you can sew the two sacks together:


::STEP 7::
Handle time!
I've made a medium handle since my bag is quite big ;)

Pin it on each side of the bag:


and sew it:

and you are done:


I sincerely hope that Spanish Stray cats manages to sell my bag: it would make me very happy! If you want to make a donation do not hesitate to visit their facebook page :)

Until next time,
Daniela

Saturday, August 3, 2013

DIY Decorative Door Wreath

I must admit I do feel a bit patriotic lately  but this shouldn't come as a surprise if you only had a look at my entrance door wreath! ;)


I've seen many beautiful wreaths on Pinterest and I made one for myself - simple yet nice! I hope you like it!

What you need if you want to make a decorative wreath :

- hot glue gun;
- 40m of twine;
- 1 Polystyrene ring (I used one of 25 cm Æ)
- 1.5/2m of ribbon - the pattern you like ;)

I have seen many pins talking about using pipe insulation since it is cheaper - I would stick with my polystyrene ring because it doesn't bend or crease, but if you want to use pipe insultation,you better follow The Penny Parlor's suggestion!

Back to wreath instructions:

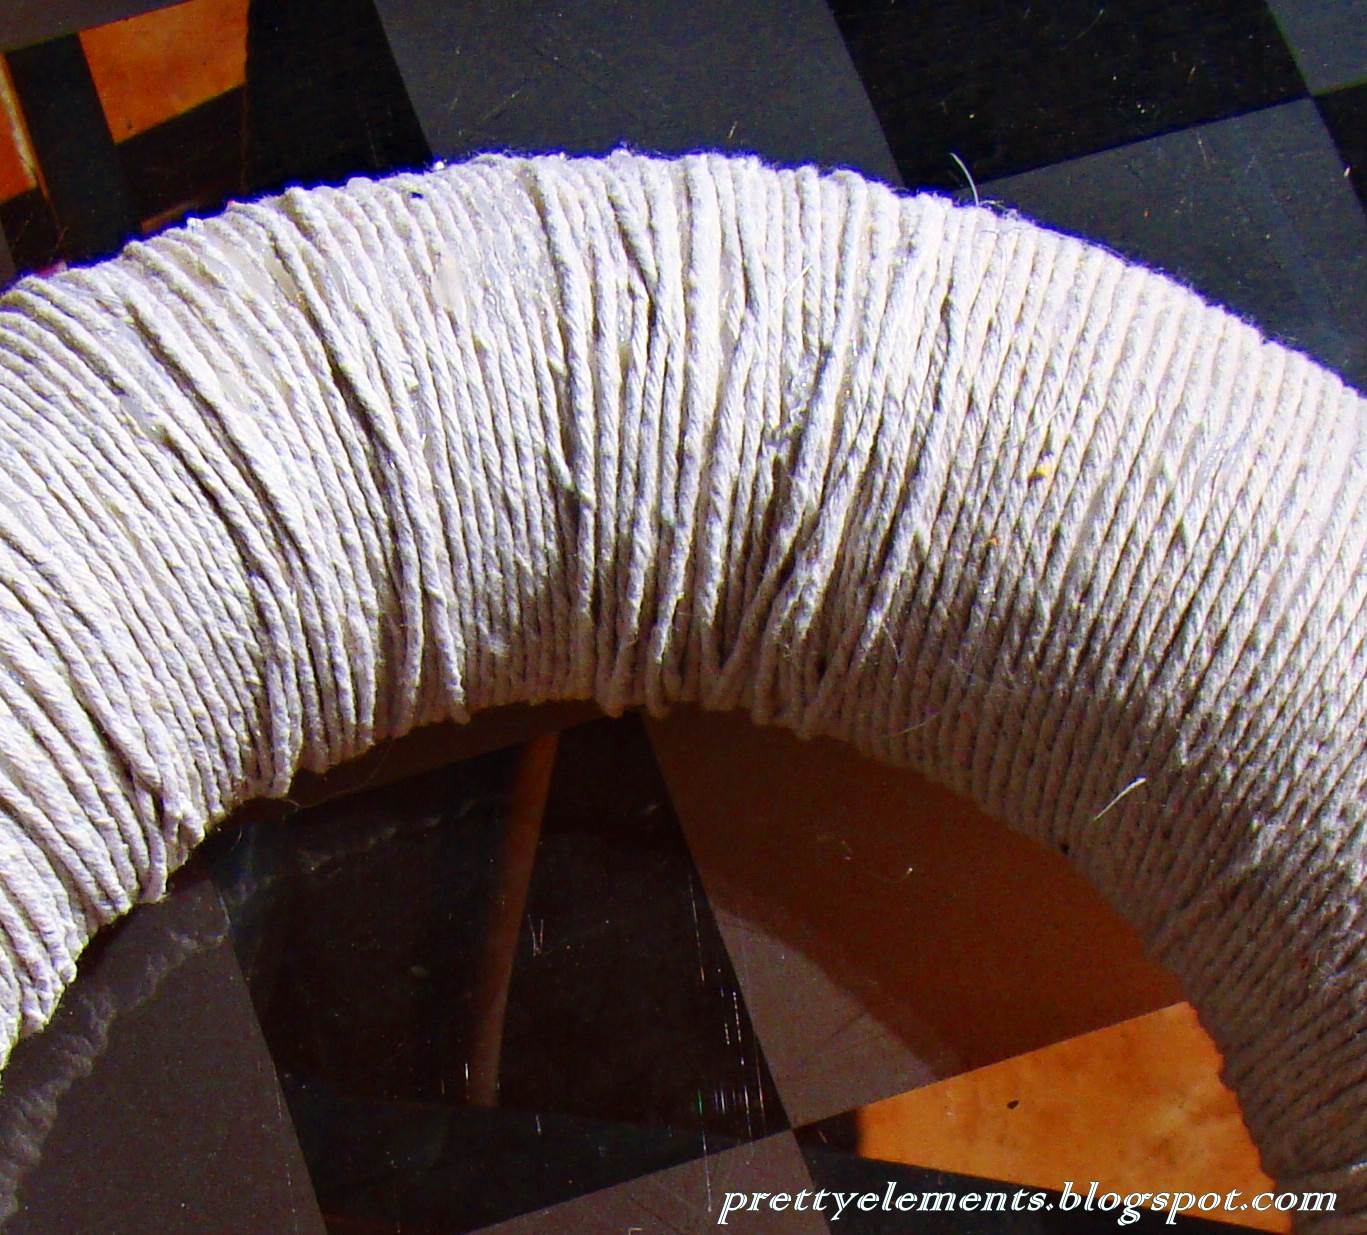
Glue the twine cord around the ring like this:


In the process I had left some white spaces due to the form of the ring - I adjusted everything by overlapping some cord like this:


After you've covered the whole ring, you can choose how to decorate your wreath, I have made a simple bow like this:

via Pinterest


and glued it to the wreath.

I used the remaining ribbon as a hanger for the door :


I hope I have inspired you a little!

Until next time,
Daniela

Saturday, May 18, 2013

Striped shirt ReFash

Today I decided to "refash" an old striped shirt. I really like it but it is a bit too long and that's why I wasn't wearing it as much as I wanted!

I have cut the edges and sew a seam down the lenght of the edges:

sorry..didn't take any better picture :/
In order to give a ruffled look, I grabbed one of the loose threads and pulled gently :) :


I started sewing the fabric to the shirt, making circles and forming a flower. This is how the flower looked like:

This is the completed shirt:

Pose apart, here you have a closer look:
Can you guess where I took the inspiration for this shirt? Small Hint: a famous girl from New York ;)


****************************************************************
I'm delighted to say that this post has been featured on:

Sugar Bee Crafts 


Until next time,
Daniela

Wednesday, May 15, 2013

What's in your Garden? Wood Panel Decor

One of the things we love about our house is the garden ;)

Few months ago we had to install 2 wood panels on our fence:


Do you wonder why? Well.. Canito, our dog, decided it was very funny to bite and destroy the plastic cover of the fence.

Wanna see a proof? there:
Thank you Canito..
Anyway, I didn't like those panels so much so I decided to make a Garden decoration out of them ;)

I painted both of them in green:


A tip for you: do not make any painting, crafting, etc under the sun.. I was boiling so much I didn't think I could make it till the end!!

Once the paint was dry I started decorating the panel with a golden phrase ;) 


Now, if anybody tells you that this is very easy although it's the first time you do it.. don't believe them! ;)

At first, it was easy..until this happened:
meh :/

Not nice!!! Luckily I still had some colour left and managed to correct the mistakes :)

This is how my fence looks like now:

My three boys enjoying the sun and the garden ;)

Do you like the outcome? The sentence I wrote is my homage to our nice garden that Stefano defines "our piece of paradise" : "If you would have a mind at peace, a heart that can-not harden, go find a door that opens wide upon a lovely garden".


I hope I have inspired you a little!

Until next time,
Daniela